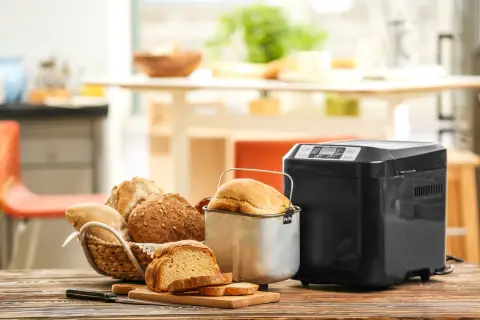
Using a bread machine at home to bake your own bread can be very rewarding. But, the post-bake cleaning is something that cannot be overlooked. To make it a less-tedious process, it’s important to know beforehand which parts of the machine require the most cleaning and how exactly you’re going to get to those parts. Whether it be crumbs, grease, or flour, there shouldn’t be any residue left from a previous bake. If you’re wanting to know how to clean a bread machine and its importance, be sure to read on till the end of this article.
Why Your Bread Maker Needs Regular Cleaning
There are a couple of important reasons why you should regularly clean your bread maker. Supposing you bought a used one. While it may still be in good shape, make sure to thoroughly clean it of any previous residue or dust, which will most likely be present, before putting any fresh ingredients into it.
If you use a bread machine regularly but do not clean it as regularly, then it will only get harder and harder to clean over time. The more frequently you clean it, the easier it will be to get it ready for another bake.
A kitchen appliance that can give you the freshest bread imaginable is something you’d want to keep running for a long time. Bread makers, when taken care of properly, will last you many, many years. If not for any other reason, factor in the money you could save by using the same machine for years without having to purchase another one.
Lastly, you don’t want to have any contaminated bread due to leftover uncooked ingredients in the corners of your baking pan. Any microbes or particles could cause this. But again, if you clean your machine properly after every use, there won’t be any problem like this and your freshly baked bread will last longer too.
Should I Oil My Bread Machine?
Not only is it important to oil or grease the bread pan before baking, but also grease the bread spindle shaft on the underside of the pan. The fully baked loaf will come out more easily and leave the inside of the pan easier to clean. For the spindle shaft, oiling is generally thought to be done only to get rid of or prevent any strange noises that may come from it when using the machine. But even if there aren’t any noises, it’s wise to grease it once every 6 months or so, which will also extend the machine’s life. There is much more to know about greasing a bread machine, but for now, just know that it’s very important that you do it.
When Should You Clean your Bread Machine?
Cleaning your bread maker should be a must-do process after every bake, whether it looks dirty or not. After you cook something, there may be small particles of undercooked ingredients at the bottom of the pan. Ingredients like flour, butter, and eggs could still be stuck in some corners which, if not entirely cleaned out after taking out the finished loaf, will develop bacteria and could contaminate your next loaf of bread.

If you’ve just bought a new bread maker, as soon as you take it out of the box, clean it up properly before using it. There could be dust or debris on it, along with the usual cardboard-box smell. You want to make sure that it’s been given a solid cleaning and dried before adding anything to it. Over time, it’s only natural for your machine to look older and more used. Cleaning the inside is important for the food you’re making, but for looks, be sure to take a step back every once in a while and see that your machine is looking as close to out-of-the-box shiny new as possible.
Can you Put a Bread Maker in the Dishwasher?
A bread machine isn’t safe to put into a dishwasher. Though there may be some bread makers that may say “dishwasher safe” on the manual or box, it’ll never be the entire machine. Putting the machine into a dishwasher will, obviously, cause irreparable damage to many sensitive parts and make your warranty void. A few parts here and there may be dishwasher safe, but it’s always recommended to wash them by hand.
If it’s just the outer parts you most want to clean, then use a damp cloth to gently wipe off any flour, grease, or crumbs stuck on the outside. As for the inside of the machine, we’ll be covering that shortly.
What to Avoid When Cleaning Your Bread Machine
There are more than a couple of important things to keep in mind before and while cleaning your bread machine. First and foremost, always make sure to check that the machine isn’t plugged in when you go in to clean it. Not only could the bread pan be hot and possibly burn you, but since this is an electrical item, you could be at risk of getting shocked.
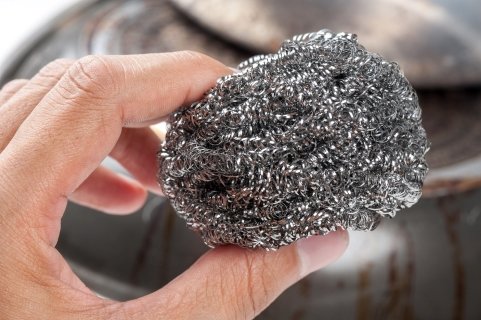
Never use materials such as steel wool or brushes to clean your bread pan. These abrasive materials will be too tough on the pan and damage the pan’s surface, namely its non-stick coating.
While the bread pan might be able to take hand pressure when cleaning it, other parts, such as the heating elements, need to be cleaned slowly and with care. This means using gentle movements and less pressure. It may take more time this way, but it will assure you that no parts will be damaged. In particular, watch out when cleaning the heating elements which could bend or disassemble with rough actions.
Even if the bread machine is off and isn’t hot, never use any water or cleaning chemicals inside the bread maker. The circuits will more than likely be affected and spoiled.
When cleaning the bread pan, don’t use any strong or toxic chemicals to clean out stuck gunk or stains. While they may be strong enough to clean out this hard-to-remove residue, these chemicals will destroy the non-stick coating, and if at all this chemical is left in any corner, it will get into your next baked loaf. Instead, try to avoid getting any hard-to-remove residue stuck in the pan in the first place by cleaning it immediately after every use. If it’s cleaned regularly, you won’t ever require any toxic cleaning chemicals and you will have a consistently easy-to-clean bread maker.
Lastly, make sure to gently wipe and dry every last piece of the bread maker that you’ve washed before reassembling it again. Only once everything is completely dry can it be assembled, connected, and used for another round of baking without any fear of electrical issues arising.
How to Clean a Bread Machine Step by Step
Going piece by piece, follow these steps closely in this order to be able to clean every part of your bread maker without any worries.
The Inside of a Bread Maker
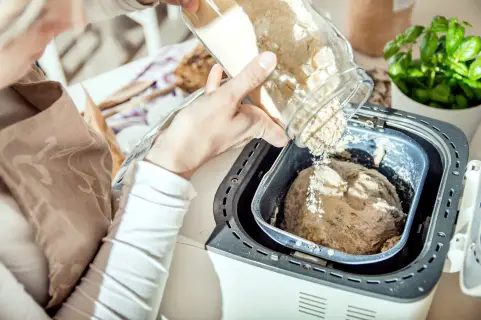
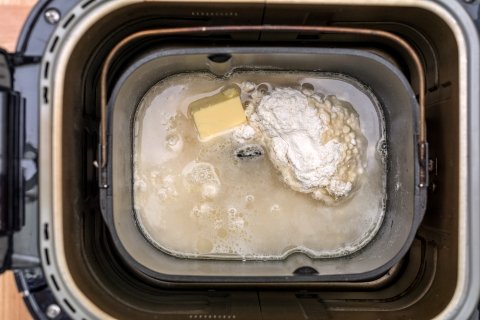
After taking out the bread pan, the main residue left inside the maker will most likely be crumbs and flour, but it is also likely there could be some spills of egg whites from watery dough.
First, clean the crumbs. The bread maker should be on its side while you gently sweep out the crumbs from every side and corner using a thin, dry paintbrush. You shouldn’t and won’t need to use water to clean this out.
Next, use another clean, slightly larger brush to remove any flour or dried dough from the maker. A dry tissue paper could also do the trick. However, if there is any slightly wet dough stuck on the inside, let it dry and then clean it out to avoid an even bigger mess.
To remove any liquid left inside the bread maker, use a fresh cloth to wipe it all up. Don’t use this cloth again to clean any other part of the maker. Just toss it in straight for a wash.
The Heating Element
The heating element of a bread maker is one of the most important to clean, yet many avoid cleaning it because it is a very sensitive part. But it can and should be cleaned of any grime and flour, which are also known to be fire hazards.
Cleaning it is simple. Wipe it properly with a damp cloth. Don’t apply too much pressure, otherwise, you could bend or disassemble the whole piece, and if there is some damage, it will be challenging to repair or even replace the whole piece. If at all the grime is too much, then slightly wet the cloth again and wipe the heating element again. Don’t spray this piece with water, as you could short something out.
Outer Parts of a Bread Maker
The exteriors of a bread maker could have several things stuck onto it. If some ingredients are stuck onto your machine, you can wipe them off with a well-rung, damp towel first. If the dirt is more potent, then use a couple of cleaning wipes and wipe down the whole machine including the buttons. This will get rid of any dirt and fingerprints left by your dirty hands during past bake sessions. Once you’re done with the wipes, use a dry towel to wipe up any remaining moisture on the machine.
For the exterior as well, make sure to never use strong cleaning solutions or spray it with water. It may take a little more time when using a plain towel, but it’s safer for the machine.
The Bread Pan
Cleaning the bread is probably the easiest part of a bread machine to clean. Since not all bread pans are dishwasher-safe, it is recommended to wash them by hand.
To clean the pan, run a rag through a dish soap and water solution and scrub the pan well but gently. If there is a lot of dried, stuck food, then pour a little warm water into the pan to loosen the food. After a few minutes, rinse it out, rub the pan well with a sponge, and rinse thoroughly again. If your pan does not have a non-stick coating or the coating has worn off, then you can scrub it using the back scrubber of a sponge. But for both types of pans, steel wool and other abrasive scrubbers are not recommended to use due to their ability to scratch the pans beyond repair.
The mixing paddles and dough hook will have to be detached from the machine and cleaned gently in warm water using some mild dish soap and a sponge.
Let All Parts Dry Completely
Once everything is cleaned properly, it’s time to let all parts dry completely before reassembling the machine. This will prevent any electrical failures and bacterial buildup once you plug it in and start using it again. Make sure to let the bread pan and additional parts dry in an upright position. This will give the bread pan the best chance to dry completely, preventing any chance for it to rust.
These steps are all basic, safe ways to clean a bread machine. Some bread machine manuals may come with specific instructions on how to clean them, but not all of them do. So, if you don’t get any cleaning tips from the manual, be sure to follow the steps above on how to clean a bread machine.
How do I Clean my Bread Machine Overflow?
The first thing you need to do, in this case, is to unplug the machine and wait for it to cool down a bit. Once it is cooler, take out your bread pan and carefully move the cooked bread into another container. Next, one by one, clean all parts of the machine immediately. If you do it immediately, it won’t take you too long to clean up the mess. However, if there is stuck or burnt bread inside the bread machine, let it dry and carefully scrape it off later. If the pan has any stuck or burnt dough, do the same as instructed earlier and soak it in a little warm water for a while and then clean it out. Once the whole machine is washed and kept in another place to dry, make sure to clean your countertop well before placing the machine back in its spot.
My bread machine pan has some rust spots on the outside of the bread pan. How do I remove these rust spots?